Authorization Flow with Postman
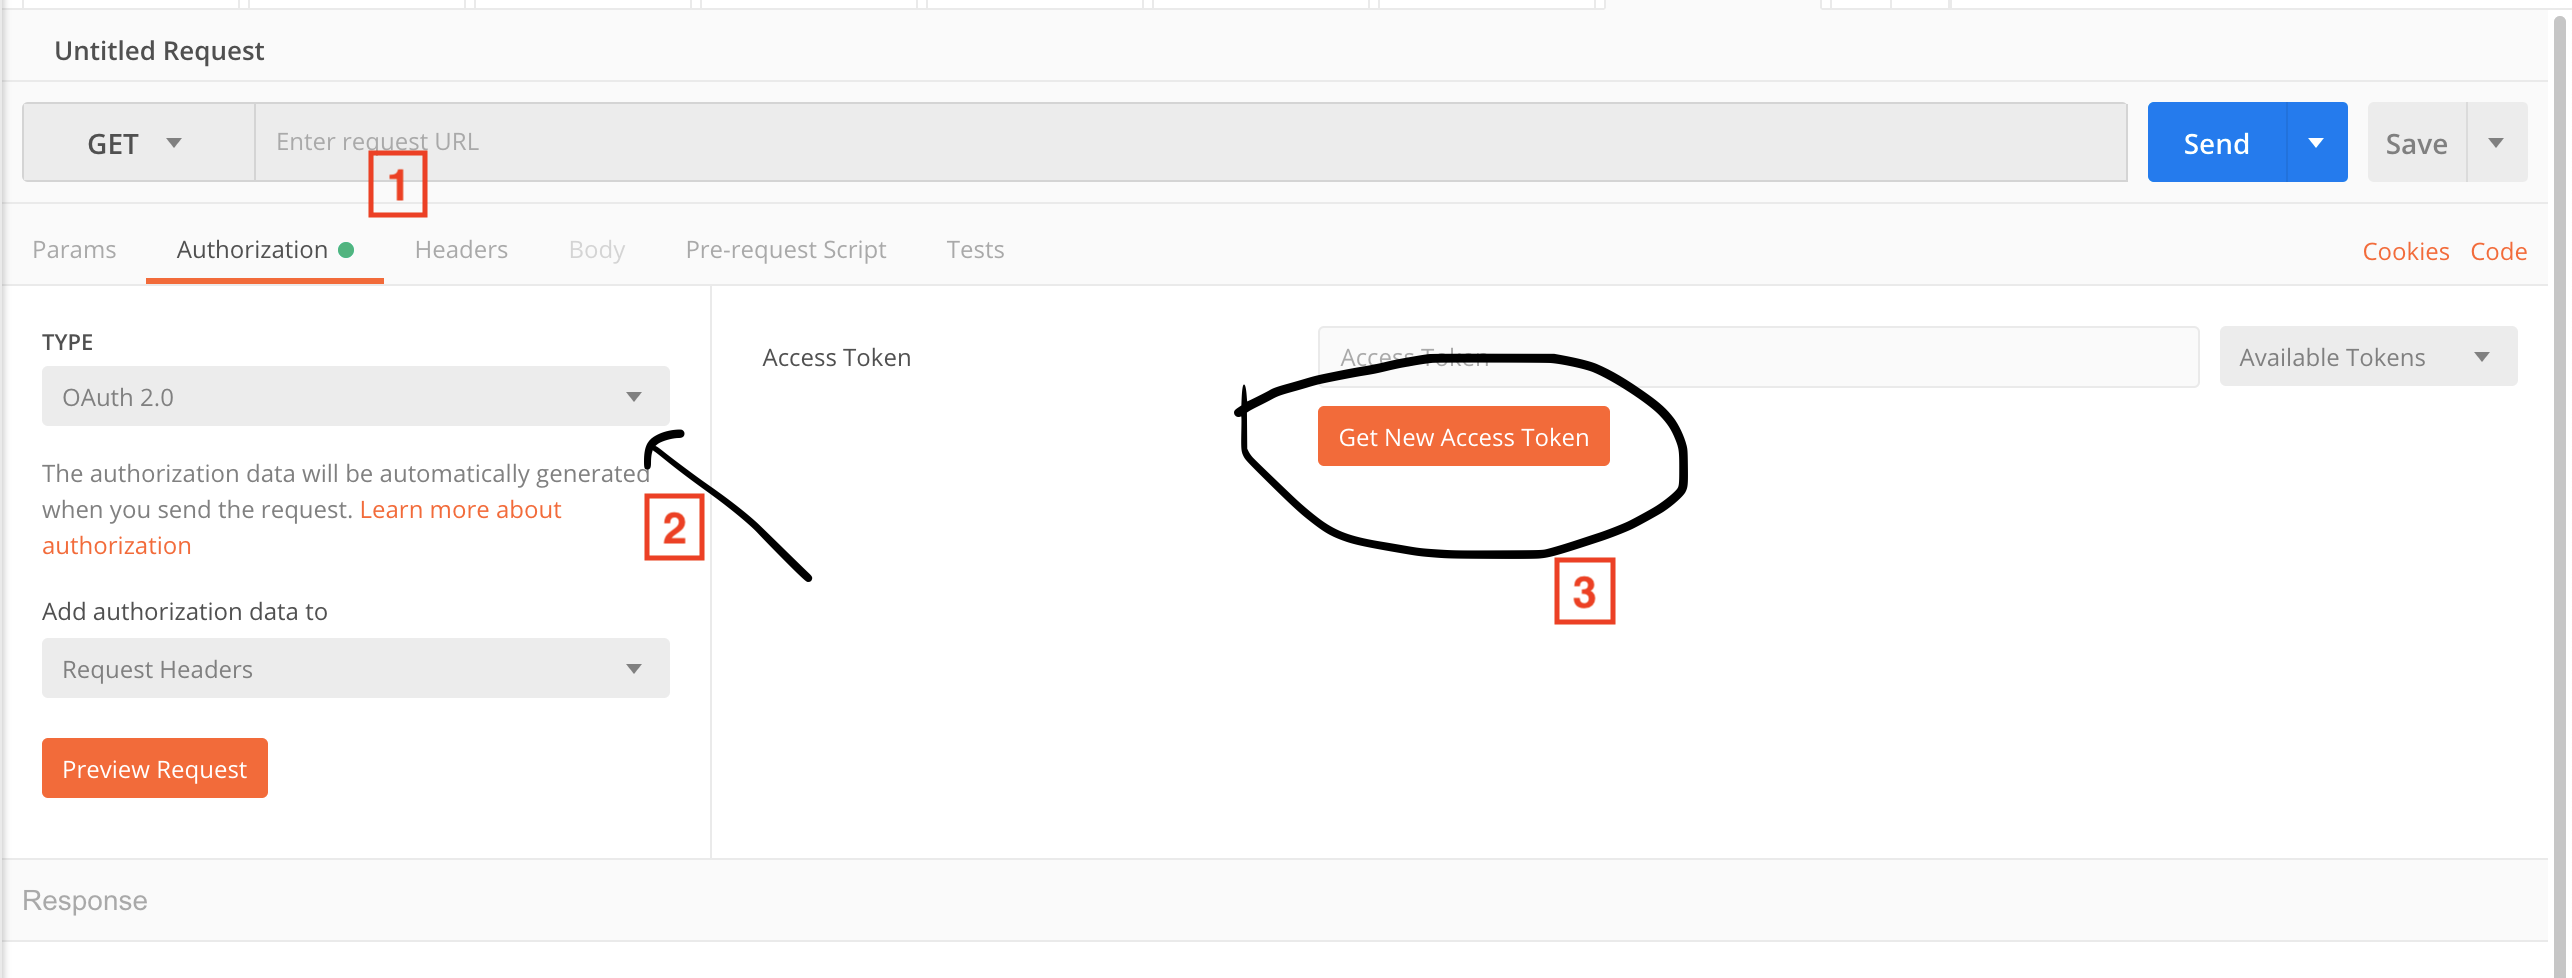
For generating your production API keys, we will be issuing you oAuth client keys that you can use to generate access tokens (essentially API keys) easily via Postman. Once you have received your oAuth2 client keys, follow these steps -
- You will have to first install Postman
- Click on "Authorization" tab and you will see a "Get New Access Token" button
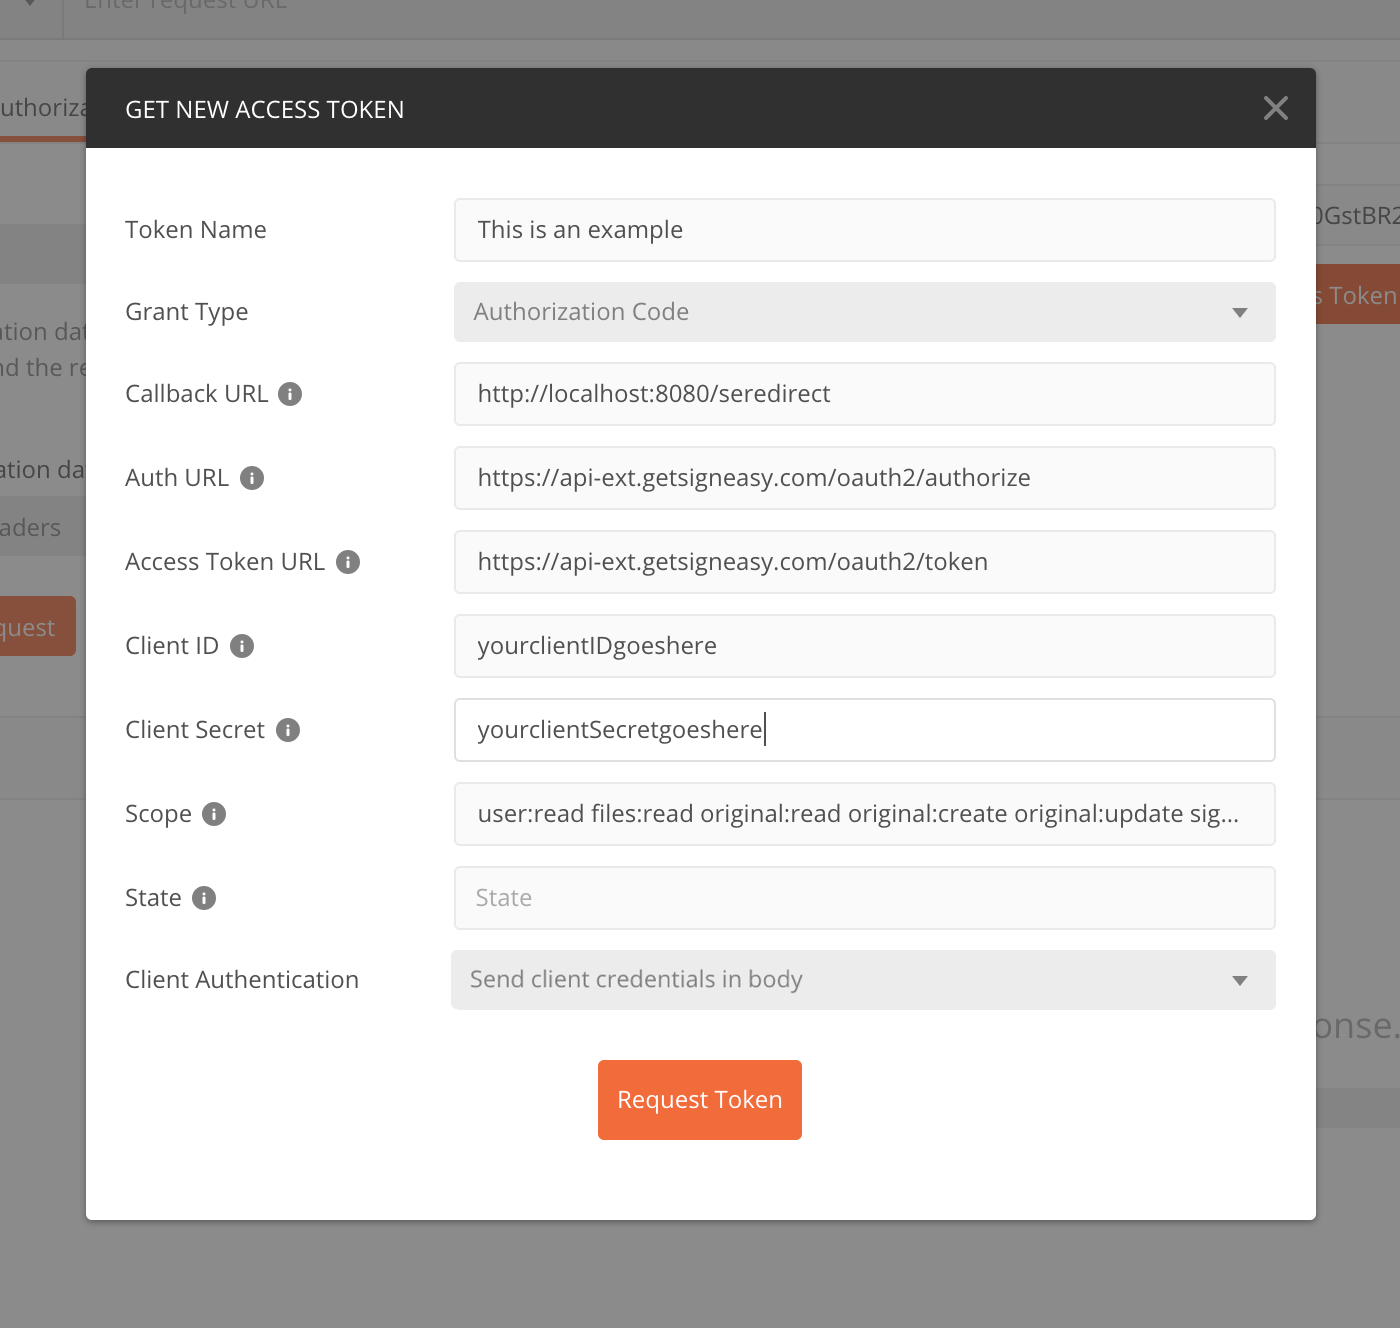
- You will then see a form where you are required to fill in the oAuth2 client details
Attention
These API keys have a validity of 1 year .
You will need to Refresh your access token. Please refer the documentation [here].
(https://docs.signeasy.com/docs/refreshing-access-tokens)You can regenerate new ones using the same steps above.
When you regenerate a new API key, the old one would be invalidated for security reasons.


Here are more details on what each one of them should be -
| Token Name | name it something you like |
| Grant Type | Authorization Code |
| Callback URL | Fill the same redirect URL value that you used to register the app. |
| Auth URL | https://api-ext.getsigneasy.com/oauth2/authorize |
| Access Token URL | https://api-ext.getsigneasy.com/oauth2/token |
| ClientID | The one assigned to you when you registered the app |
| Client Secret | The one assigned to you when you registered the app |
| Scope | user:read rs:read rs:create rs:update original:read original:create original:update signed:create signed:read signed:update files:read template:manage webhooks:manage rs:signingurl user:create |
| State | Non Mandatory |
| Client Authorization | Send client credentials in body |
- Click on Request Token and you will see your access token generated which can be used as your API key in production.
Updated over 3 years ago