Authorization Flow without Postman
This is a guide on how to authorize multiple SignEasy users to use your app and let you manage their account.
The flow to authorize users for your app is -
- Users are redirected to request their SignEasy identity
- Users are redirected back to your site
- Your app accesses the API with the user's access token
1. Users are redirected for their SignEasy identity
GET
https://api.signeasy.com/oauth2/authorize
| Parameters | Type | Description (required if |
|---|---|---|
client_id | string | Required. The client ID you received when you registered your app. |
redirect_uri | url | Required. The URL in your application where users will be sent after authorization. See details below about redirect urls. |
scope | string | Required. A space-delimited list of scopes. |
response_type | string | Required. The value should always be code. |
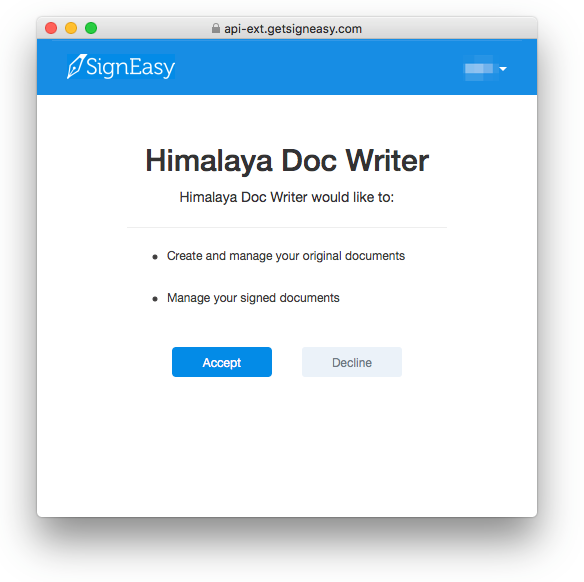
Your users would see a prompt to log in and a screen to authorize your app, something like this.

A typical consent screen
2. Users are redirected back to your site
If the user accepts your request, SignEasy redirects back to your site at the redirect_uri specified in the previous step, with a temporary code in a code parameter.
Exchange this code for an access token:
POST https://api.signeasy.com/oauth2/token
const request = require("request");

const options = {
  method: 'POST',
  url: 'https://api-ext-dev.getsigneasy.com/oauth/token',
  json: true,
  formData: {
    client_id: <CLIENT_ID>,
    client_secret: <CLIENT_SECRET>,
    redirect_uri: <REDIRECT_URL>,
    grant_type: 'authorization_code', // do not change this
    code: <GRANT_CODE>
  }
};

request(options, function (error, response, body) {
  if (error) throw new Error(error);

  console.log(body);
  //
});
| Parameters | Type | Description |
|---|---|---|
client_id | string | Required. The client ID you received when you registered your app. |
client_secret | string | Required. The client secret you received when you registered your app. |
code | string | Required. The code you received at your redirect URI. |
redirect_uri | url | Required. The same redirect_uri you used in the first step. |
grant_type | string | Required. The value should always be authorization_code. |
accesstokenttl | seconds | Optional. The expiry of the generated access token in seconds. Default is 1 year validity. |
Response
By default, the response takes the following form:
{
  "access_token": "JqHyGD1SGIOSmjuVUIedOCnzLxjjXY",
  "scope": "pending:read",
  "token_type": "Bearer",
  "expires_in": 3600,
  "refresh_token": "QalMjtiIldIjnXHQYWz0xuk1VazUSX"
}
3. Use the access token to access the API
The access token allows you to make requests to the API on a behalf of a user. You should include this access token in the Authorization header.
Authorization: Bearer ACCESS-TOKEN
curl -X GET -H "Authorization: Bearer <Access Token>" https://api.signeasy.com/v2/me
If you encounter cases where your access token has expired, use the refresh_token to generate a new access_token.
Redirect URLs
With SignEasy APIs, Redirect URLs are treated very strictly. Unless it is a URL that is already authorized for use by your app, you cannot use a new Redirect URL.
When you make the API call in Step 2 to generate a new access_token, the redirect_uri must match exactly the URL you provided in Step 1.
You cannot add new Redirect URLs once the oAuth app is created by yourself. If you need to add new Redirect URLs, you can reach out to us to add new URLs and we will add them for you.
Updated over 3 years ago